Tip: Select any of the images or GIFs in this article for a closer look.
Shipping notifications keep customers updated on the delivery of an order they placed with your shop. The notifications contribute to a positive customer experience and help minimize shipping inquiries for your customer service team.
What You Can Do With an AfterShip Automation Flow
- Send branded notifications for shipping statuses like in transit, out for delivery, delivered, and failed attempts.
- Proactively notify your customers via Postscript when items ship or are delivered.
Create an AfterShip Automation Flow

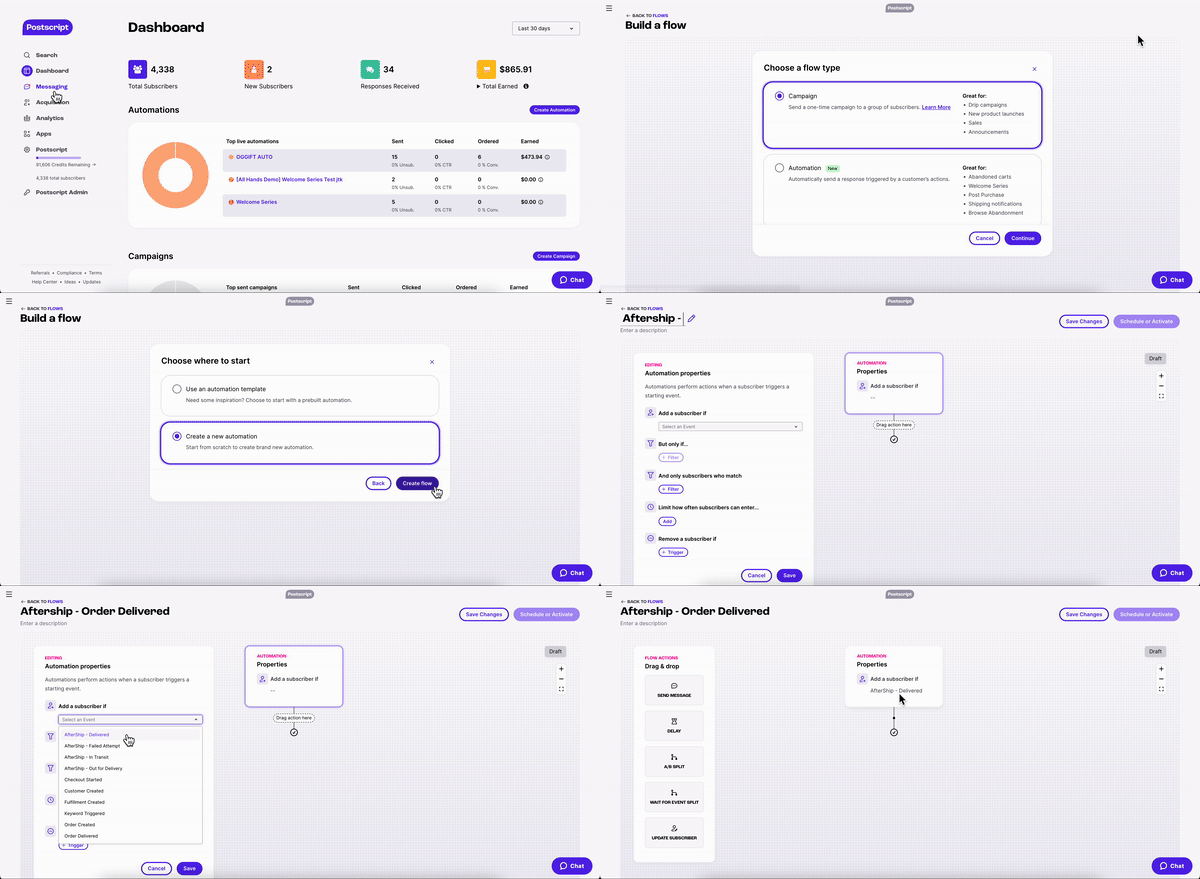
- Select Messaging in the side menu of your Postscript dashboard, then select Flow Builder.
- Select Create Flow in the top-right corner of the page.
- Choose Automation, then select Continue.
- Select Create a new automation, then select Continue.
- Give your automation a name. We recommend you give it a name that indicates its purpose (i.e. AfterShip - In Transit, AfterShip - Order Delivered, etc.)
- In Automation properties, select your AfterShip-related trigger from the Add a subscriber if drop-down.
- AfterShip - Delivered: Notifies the customer that their order has been delivered at their place of residence.
- AfterShip - Failed Attempt: Notifies a customer of a failed attempt to deliver the order. You can include a link to the order tracking page where the customer can get more information on the error and necessary next steps.
- AfterShip - In Transit: Notifies the customer that their order is on the move. You can include a link to the order tracking page so the customer can stay up-to-date.
- AfterShip - Out for Delivery: Notifies the customer that their order is out for delivery with the carrier.
- Add other automation properties (i.e. subscriber frequency filter, subscriber filters, trigger filters, etc.) as needed. Learn more about automation properties here.
- Select Save in the bottom right corner of the Automation properties editor.

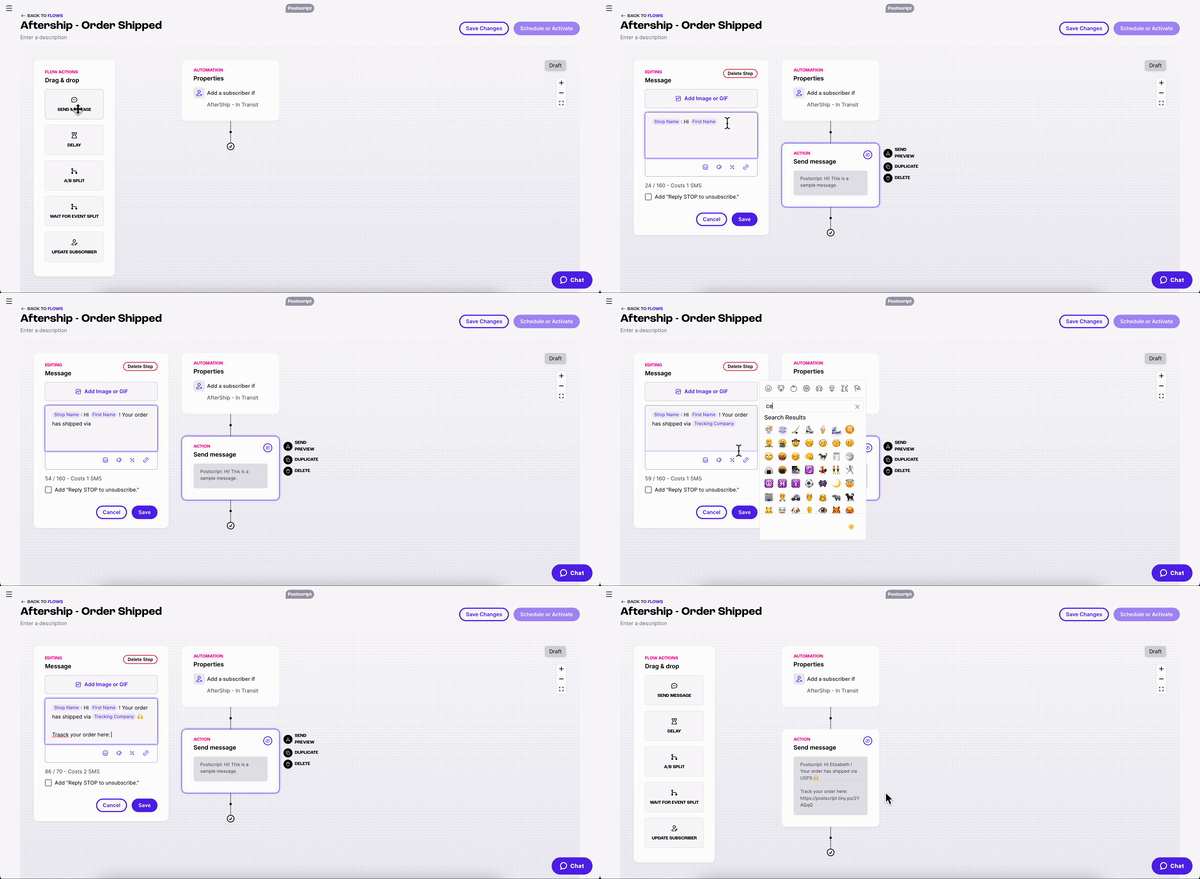
- Once you've saved your automation properties, drag the Send Message action from the Drag & Drop menu on the left-hand side and drop it into your flow.
- Craft the message by adding text to the message editor on the left-hand side. You can also add an image or gif to the message by dragging and dropping the media in the Add Image or Gif box at the top of the editor. Tip: Use giphy.com to find gifs you can add to your messages.
- Choose the tracking-related tag from the Tag drop-down, then select Insert Tag. You can add multiple tags if desired.
- {tracking_number} provides the customer with their order number, should they need to contact your support team.
- {tracking_company} notifies the customer of the shipping carrier in possession of their order.
- {shipping_link} populates a dynamic link to the customer's unique order tracking page.
- Once done, save the message by selecting Save in the bottom-right corner of the editor.
- Save the entire automation flow by clicking Save Changes in the upper-right corner of the page.
-
If you're ready to send your flow, select Schedule or Activate in the top-right corner of the page. You have two options when sending a flow:
- Activate immediately: This option will immediately begin the flow allowing subscribers to enter the automation based on the selected properties.
- Activate at a scheduled time and date: Choose when you'd like the flow to begin allowing subscribers to enter.
Get Support
Have questions? Please feel free to reach out to our wonderful Support team at support@postscript.io or via live chat. You can also submit a support request here!
Need ongoing channel strategy guidance? Please fill out this form and we'll connect you to one of our certified partners.